Friday, May 29, 2015

WEEK 5 - Granny Rose CAL: The Edge/Border

WEEK 5
The Edging/Border

We are very close to the "TADA" finish line.

Are you ready for the final step?

OK here it goes:
Single crochet around the entire afghan, with white,
 to straighten out where the granny squares
 join and give it a clean edge to work with.

At this point you could follow the picot edge from your pattern here,
use any edge/border design that you like,

~OR~

use a variation from the border from this pattern which is
what I decided to do.

(Those are rose petals leftover from a Mother's Day arrangement -
rose petals...rose afghan, it fits, huh?)

Variations from border pattern:

ROW ONE: is a row of sc as mentioned above with three sc in each corner.

ROW TWO: is *1 hdc in each of the next 3 stitches then a hdc decrease.*
Repeat from * to * to end with 3 hdc in each corner.
(This will pull your edges in a little tighter in order to avoid a loose ruffly look.
If you like the ruffly look then simply hdc in each sc from the previous row.)

ROW THREE: is the bobble row from the border pattern.
(You can add a row of dc after row three, like in the pattern;
however, I did not on this afghan.)

ROW FOUR: is the shell row from the border pattern.

ROW FIVE: is the picot fan row from the border pattern.


That's it and you are done!


Next week I will reveal the finished afghan
and I would love to see yours too!

Also see appleblossomdreams on Instagram.
#grannyrosecal

Have a rosy week!

Please send photos of your projects and I would be happy to post them.
Send a link or attach photos to and email and send to
astri.bowlin@gmail.com

Friday, May 22, 2015

WEEK 4 - Granny Rose CAL: Granny Row and Bonus Row and Join

Hey, hey my CAL friends!

Now let's add a granny row to your granny rose squares,
add an optional hdc row and join the squares.

I hope your leaf row went well and that you are ready to push
up your shirt sleeves for a busier week this week.

WEEK 4
The Granny Row,
Optional Bonus Row and Joining Squares

Part of this week is similar to last week;
you'll add a granny square row in the lighter pastel colors of your yarn.
  Just follow step four in your pattern from here.

I used:
Sherbet
Soft Peach
Spring Green
Lemon
Apricot

I tried to make an even amount of each one, but it worked out a little more random than that.
I made more Sherbet and Spring Green.

Every effort was made to ensure that the granny row
 was a different color than the outside of the rose petals.

Also, when I placed them together I tried not to have two roses colors
 and two granny row colors next to each other,
 but occasionally that happened and that's alright!
Once you have finished all the granny rows,
you are ready to join the squares in any way you choose.

Here they are with a sc join:
Or you can join as per the pattern.

I was thinking that I wanted more white to soften the afghan.

So here's an added optional row of white.
(You will; however, need more than one skein of white if you choose this option,
probably three skeins if you include the additional border option for next week.)

It's just a hdc all the way around the granny rose square.

Like this:

Start with 3 chs in the corner.

2 hdc in same corner

a hdc in each st around

  including a hdc in the ch space from the granny row below.

 Continue,

 with 3 hdc in each corner.

Finish off with invisible join, if preferred:

Weave in ends and

there you go.
A finished square with a pretty white hdc edge.


Do this 64 times and you'll get this:

Here's a photo with and without the bonus hdc row:
You choose what you like best.
You could even made the hdc row a different color on each square - that could be fun!

Once you have them placed in an order that you like, you will join them.
This is how they look joined with a single crochet:

The following photos might help with the sc joining:

When you join the second direction simply ch 1 to jump over the first set of joining rows:


Does it look like this?
I hope so!

Happy joined squares that all have each other now!

Join us next week for the final week: 
WEEK 5
The Edging

Have fun with your pretty squares!
(I think this is my most favorite Granny Rose project, so far.)

Also see appleblossomdreams on Instagram.
#grannyrosecal


Friday, May 15, 2015

WEEK 3 - Granny Rose CAL: Leaf Row

Hi there!

So how did the roses go?
Did you finish all 64?
If not, keep up the good work, if so, it's time for:

WEEK 3
The Leaf Row
 This weeks "assignment" is easy.
Take all your roses and follow Step 3 on your pattern from here
and crochet the leaf row in Meadow or the color of your choosing.

Here's a little variation that you may like on the leaf row:

Start with ch 4 in the ch space of any outside petal:
(this will count as a dc and ch space for the corner)
 then 4 dc in same space.
The photo shows 3 but 4 works better since
 2 of the chains will count as your  corner.
(This will be part of your first corner,
and you will finish this corner at the end.)

I also changed the sides a bit from the pattern as follows:

After the corner, ch 2 and sc in the middle of the bottom of the petal instead of 3 dc,
 then ch two to the next corner.

Perhaps the following photos will help:
This is the finished square from the back:
And here is a close-up from the front.


Here's the finish of the leaf row:
2 dc back into that same beginning corner to complete that corner,

then an invisible join:

Weave in ends:
See how the 3 chs at the beginning made for only one ch for the middle of this corner,
 that's why 4 chs at the beginning would have worked better so there woudl be 2 chs for the corner.
Once again, I live and learn; a student of myself and my blog friends. haha ;-)

Complete the leaf row on all 64 squares and then next
Friday May 22nd you'll be ready for the granny row
along with and extra row option of a delightful surprise that
varies from the pattern. ;-)

Let me know if you have any questions;
otherwise I will see you next week
for the 
GRANNY ROW!

P.S. Please let me know if you have any photos of your project
 you would like to share and I will post them.
Please email them to astri.bowlin@gmail.com.
Also see appleblossomdreams on Instagram.
#grannyrosecal

Friday, May 8, 2015

WEEK 2 - Granny Rose CAL: The Rose

Hello Again!

Okay, so I trust you are ready for:

WEEK 2
The Rose
I gather that you have gathered your supplies and you are ready to make 64 roses this week,
or what ever number you chose.

Please refer to Week 2 of your pattern from here, and note that
 there will be a few tweaks as explained below.

Crochet 80 centers with the following change:
(I used the "Magic Circle" option, then ch 4 for first dc - counted first sc
 that connects the magic circle as a ch)
Pull on the yarn to bring in the circle.
 Close the circle with either a slip stitch into the third beginning chain or stitch
 as below for an invisible join.
The pattern will slip stitch down into the ring, but this only works
if you stay with the same color of yarn for the petals.

Since the pattern is written for a one tone rose, you would normally
sl st into the ring and start your chains on the back of the circle.
If you are new to the rose you might want to practice it with one color first,
or you could make the blanket one-toned roses, as well.

After the last dc, then join the circle by creating an invisible join like this:
For a really great invisible join,
see Mr. Micawber's tutorial here.
That's another blog full of crochet delights!


 Or you can sl st into the third chain, as mentioned above,
and call it good. :-)

They'll pretty much look like this either way.
Don't crochet too tight or it will be difficult to crochet in between the dc's.

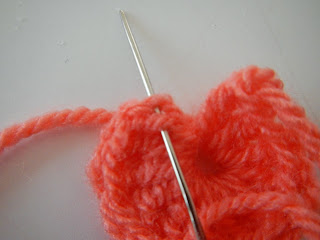
Flip the circle over so the back side is facing you:
 Slip stitch in between any two dc's:
 and start the ch 3, as indicated in the pattern:
 A different angle:

Continue following the pattern until your rose is done.

Colors:
If you are using the same colors as the afghan pictures then proceed as follows:

You will have nine colors for the roses.
Make eight centers of each color except Lemon: TOTAL=64
 Take each set of the same colored eight centers and crochet two rounds of petals
in the other eight colors that are different than the center.

That's difficult to explain so here it is explained in a different way,
that may make it clear as mud. ;-)

Here are three sets of the eight roses.
Each set of eight has the same colored center and
then the other eight colors (because there are nine total) are the outer two rows of petals.
In this photo, the three sets of centers are (from top to bottom):
Shrimp
Sherbet
Spring Green

and the outer two rows of petals are (from left to right):
Fondant
Turquoise
Soft Peach (or Candy Floss)
Apricot
Lemon
Citron
The last two columns are different because the middle
 would have ended up as the same color as the petals,
 if I would have continued this same thought pattern.
I hope this explains why you need nine colors for eight squares.
You will need to leave out one center color though,
I left out Lemon, although the first photo shows one - it was an accident, oops.
I choose Lemon because it was pretty close to Citron.
(They even sound like the same color: same fruit - different language. ;-) )
But of course Lemon will be used for the outer petals for eight of the roses,
each with a different colored center (except a Lemon center, hehe.)
Ooooo, my mouth puckers.

This was my way of ensuring that I mixed up the colors as much as possible.
The end result of the afghan does not have a specific color pattern to it -
it's random, but I was concerned that I would start repeating the combinations
that I liked best if I didn't have a method to mix it up. :-)

On a different note, I adjusted the first row of petals by adding a triple crochet
 before and after each chain that is the top of the petal, 
which made the petal a bit longer and wider,
I don't know if I love it, but you could try it and see what you think,
or stick with the original pattern.
I kind of wish I would have stuck with the original,
but you may like the variation. I was thinking it would make it fluffier,
but it may not have needed any extra fluff.
Play around with it and see what you can come up with.

When you are finished you will have 64 roses, as this afghan will be 8 x 8 granny squares,
and there will not be two roses alike (unless you want it that way - which is really pretty too!)
Whew!
I think that was the most difficult part to explain.

Good luck this week!
In the past, these roses have been made by some speedy crocheters (in one color)
in less than five minutes (two colors would take longer).
See this post for details on what's possible, but not necessarily recommended -
this should be a leisurely and enjoyable activity, right?
But there may be some of us that have the need for speed.
As a reference point see Cogaroo's speedy rose making in under five minutes here!
She is the reigning crocheted rose speed champion.
She has awesome crochet blog, too, currently sporting a free crochet doll pattern
 for Cinderella's pink dress. Very pretty.
At that speed, nine roses could be done in less than an hour a day
and multiply that by seven days (with 10 roses the last day)
 and the roses are done.
Then you will be ready for Step 3 when it comes out next Friday, May 15th.

Let me know if you have any questions;
otherwise I will see you next week
for the 
LEAF ROW!

P.S. Please let me know if you have any photos you want to share and I will post them.
Please email them to astri.bowlin@gmail.com.
Also see appleblossomdreams on Instagram.
#grannyrosecal